
Rear glass damage can turn an ordinary drive into a guessing game about visibility, safety, and how soon you need to act. The calm approach is to assess the crack, shield the area, and plan a repair window that won’t create bigger issues. Early attention to rear windscreen repairs helps prevent moisture intrusion, protects defogger lines, and keeps fragments from spreading. In my own car, a measured response—photos, tape, and a slower route—kept a short fracture from creeping while I organised professional help. This guide translates that calm method into practical steps you can follow today, so choices feel steady rather than rushed.
Signs your rear windscreen needs urgent attention
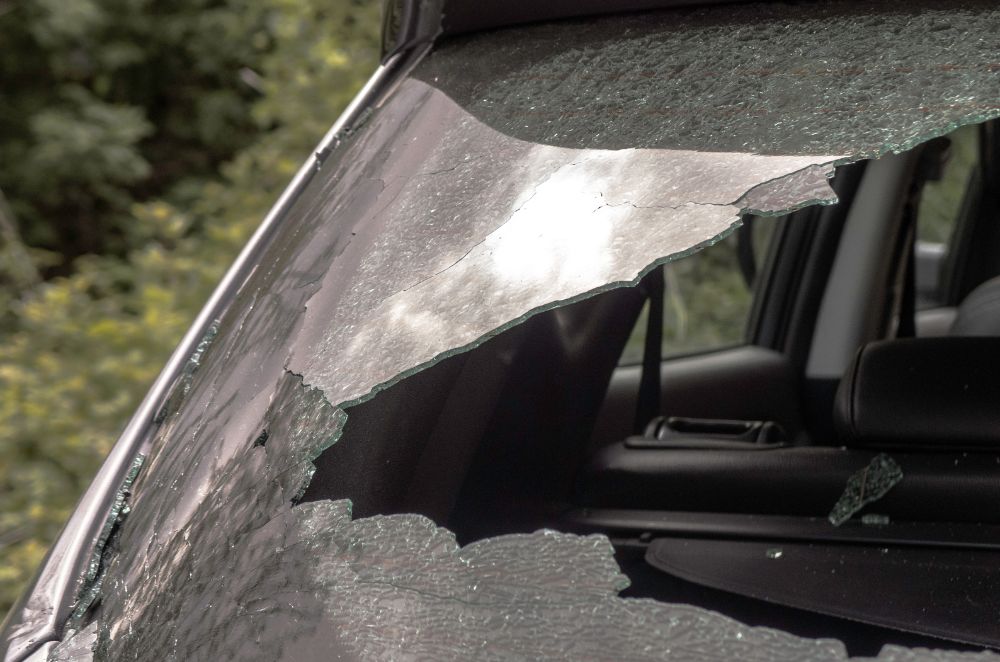
Clear signs matter because they guide timing and limit risk. A quick inspection tells you whether to park the car or drive gently to a safer spot. Look for changes over a day rather than minutes; movement over time tells you more than a single glance.
- Crack pattern: Spidering across the heating lines is a higher-risk pattern because vibration can travel through the grid. If the branches lengthen between morning and evening, treat the pane as unstable until checked.
- Edge origin: Damage that starts at the edge stresses the whole pane and tends to run further with temperature swings. Even gentle tailgate closures can nudge the line forward when the origin is at a corner.
- Water ingress: Damp in the boot or headliner signals a path for moisture that can corrode wiring and trim clips.
- Sensor impact: Cameras and antennas embedded near the glass may misread when the surface deforms or fogs.
Two calm minutes with a torch and tissue usually reveal what the next step should be. If unsure, choose caution and reduce speed until the view behind is dependable.
Repair or replace: making the right call
The decision turns on safety, cost, and how the damage behaves over days. Small, stable chips or short cracks away from edges often repair well; long, spreading lines near the perimeter usually push toward replacement. Environmental factors matter as well, because heat, cold, and vibration dictate whether a small flaw stays put or travels quickly.
- Size and location: Chips smaller than a fingernail and cracks that do not touch edges are typical repair candidates. Marks within the sweep of the rear wiper or across demister lines deserve closer scrutiny.
- Heating grid: Broken defogger lines can be mended, but a web of breaks may make replacement more sensible. Testing with a simple test lamp can reveal cold spots you cannot see with the eye.
- Glass type: Laminated panes allow some repairs that tempered panes do not; check your vehicle’s build plate.
- Total cost view: Consider parts availability and downtime alongside price; rushing often increases spend later.
Guidance on vehicle safety and compliance emphasises maintaining clear views and effective safety systems, which supports a conservative approach when the defect sits within the driver’s rearward line of sight. In practice, a stable, minor mark may wait a day; anything moving or deep should be booked promptly. Documenting size and position helps get like-for-like quotes and prevents surprises on the day.
First steps that prevent further damage
Once you have checked that driving is still safe, a few small actions keep the situation from worsening while you arrange the fix. These take minutes and protect the heating grid, trim, and interior fabrics. The goal is to stabilise conditions so the damage neither grows nor contaminates the site before the technician arrives.
- Cover and seal: Use temporary film over the crack to block dust and moisture, avoiding tapes that leave residue on elements. Leave a tiny vent gap if fogging is heavy, so moisture does not condense behind the patch.
- Ease temperature swings: Park in shade and avoid blasting hot air on cold glass; sudden changes make cracks travel. A windscreen sunshade in the rear helps even out cabin temperatures in direct sun.
- Limit vibration: Remove heavy items from the boot and close the lid gently so shock does not propagate. Avoid rough roads where possible until the panel is stabilised.
- Document clearly: Photograph the damage with a ruler for size and a note of the weather; it helps during quotes.
On a frosty morning last winter, I noticed a short line radiating from the top corner. A patch of film, soft cabin heat, and a slower route bought a quiet day to organise help and kept the mark from doubling before lunch. Understanding the difference between repair vs replacement criteria made those choices feel obvious rather than lucky. That simple routine avoids the common mistake of blasting the defrost and slamming the tailgate in frustration.
What to expect during rear window service?
Knowing the steps reduces stress and keeps you involved. Technicians follow a sequence that protects paint, wiring, and seals while restoring strength and function.
- Assessment and prep: Verify glass type, heating layout, and any antennas, then mask paint and trim to prevent scuffs. Interior covers keep falling, leaving fragments from the marking upholstery.
- Removal or repair: For repairs, resins are applied and cured; for replacements, the pane is cut out and the aperture cleaned. Old adhesive is trimmed to a uniform thickness so the new bond sets correctly.
- Reinstatement: New glass is bedded, heating connectors reattached, and trims refitted with clips checked for fatigue.
- Quality checks: Defogger function, leak tests, camera calibration, and a careful clean ensure the job leaves no surprises.
A well-run appointment feels methodical rather than rushed, with clear explanations at each step. Knowing how windscreens keep you safe often highlights structural support and occupant protection; rear glass contributes in quieter ways through visibility, cabin pressure balance, and electrical integrations. Let the vehicle sit as recommended so adhesives cure fully before you resume normal driving.
Keep your rear window reliable
Reliability comes from small habits: gentle closures, mindful parking, and staying ahead of seals that begin to tire. Wash with a soft cloth rather than abrasive pads that cut fine arcs into the defogger lines and make fogging worse on cold mornings. Replace worn wiper blades before grit turns them into sandpaper, and keep washer jets aimed so fluid clears evenly without streaks. After storms, check the boot for damp and clear drain channels so hidden moisture does not linger near looms and connectors. When a mark appears, note the size and weather, then set a calm plan rather than a hurried patch; that rhythm protects visibility, preserves heating performance, and keeps the cabin dry over the long haul. Store a small kit in the boot—microfibre cloth, mild cleaner, spare blades, and a torch—so minor issues never escalate on a wet evening. Regular checks after refuelling keep tiny issues visible before they become weekend problems for you.